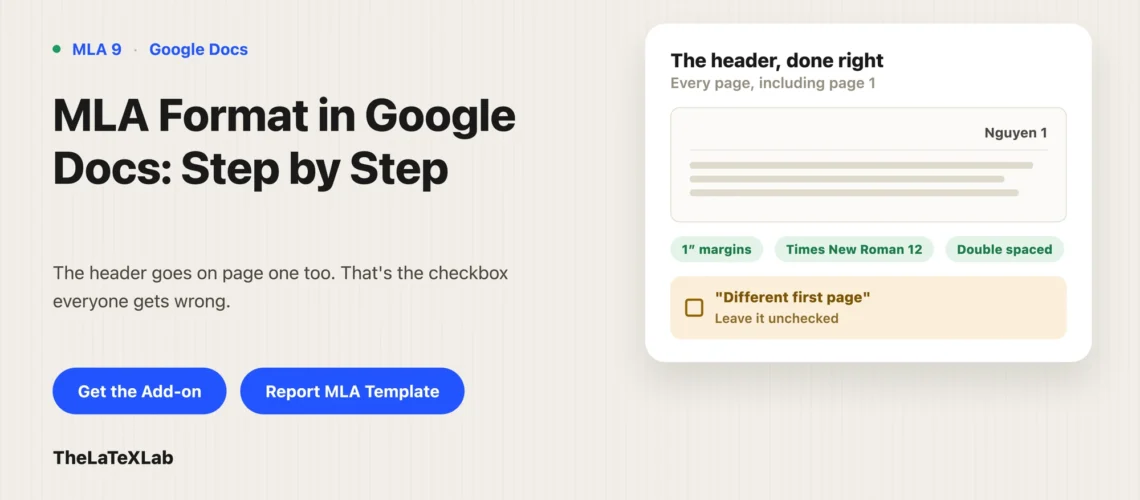
Learning how to add MLA header in Google Docs takes about a minute – MLA wants your last name and the page number on every page, including the first, so the “Different first page” box stays unchecked. This guide walks the full MLA format setup in Google Docs, the header, margins, font, spacing, the first-page heading, citations, and the Works Cited page, in the order you would actually do them.
What MLA 9 requires on the page
Before touching Google Docs, the target you are formatting to (Purdue OWL has the full spec if you want to check anything):
- Margins: 1 inch on all four sides, on every page including Works Cited.
- Font: a legible font with clear contrast between regular and italic. Times New Roman 12 point is the safe default. MLA also accepts Arial 11, Calibri 11, and Georgia 11.
- Spacing: double spaced throughout, with no extra space between paragraphs.
- Running header: your last name, a space, then the page number, in the top right corner, half an inch from the top, on every page.
- First page heading: your name, instructor, course, and date, left aligned at the top of page one. No title page.
- Title: centered, title case, no bold, no italics, no quotation marks, no underline.
- Paragraphs: first line indented half an inch.
Two of those are already right in a new Google Doc. Margins default to 1 inch, and the header sits half an inch from the top. The rest you change.
How to add MLA header in Google Docs
The header is the page number and your surname together, so add the number first and type the name in front of it.
- Click Insert > Page numbers and choose the first option, which puts the number in the top right of every page.
- Double-click the number to put your cursor in the header.
- Click immediately before the number, type your last name, then a space.
- Check the header is right aligned. If it is not, select it and press the right-align button.
- Set the header text to the same font and size as your body text. Google Docs does not always carry it over, and a header in Arial 11 above a paper in Times New Roman 12 is a common giveaway.
- Click anywhere in the body to close the header.
You should end up with Nguyen 1 in the top right of page one, Nguyen 2 on page two, and so on.
The MLA header goes on the first page too
When you open the header in Google Docs you will see a Different first page checkbox. Leave it alone.
That option exists for formats with a title page, where page one carries no number. MLA has no title page and wants the running header on every page, page one included, and on the Works Cited page. Checking the box removes it from page one, which is the single most common formatting error we see in MLA drafts done in Google Docs, because a lot of general Google Docs tutorials suggest ticking it.
The one exception is if your instructor explicitly asks for no number on the first page. Their instruction beats the style guide. Otherwise, unchecked.
How to add MLA format in Google Docs: font, spacing and indents
Now the body text. Select everything first with Ctrl+A or Cmd+A.
- Font. Set the font to Times New Roman and the size to 12 in the toolbar. Google Docs defaults to Arial 11, so this needs changing on every new document unless you save a default style.
- Double spacing. Format > Line & paragraph spacing > Double.
- Remove the paragraph gap. In the same menu, click Remove space after paragraph. Google Docs adds a gap after every paragraph by default and MLA does not want one. If the option shows as “Add space after paragraph” instead, there is no gap and you are fine.
- Paragraph indents. Press Tab once at the start of each paragraph. Half an inch is the Google Docs default tab stop, so one press is correct.
If you write MLA papers often, set this once and stop repeating it: format a blank document the way you want, then Format > Paragraph styles > Options > Save as my default style. New documents open in Times New Roman 12, double spaced.
The first page heading and title in MLA format
At the very top left of page one, before anything else, four lines, double spaced like the rest:
Your Name
Instructor Name
Course Number
15 July 2026
The date is day month year in MLA, so 15 July 2026, not July 15, 2026.
Then the title on the next line, centered, in normal text. Do not use a Google Docs heading style for it. Heading 1 changes the font, size, and color, which breaks MLA, and it is why titles come out in blue Arial when the rest of the paper is black Times New Roman. Center it with the alignment button and leave the text formatting alone.
Then start writing on the next line, left aligned, first line indented.
How to add MLA citation in Google Docs
Google Docs has a built-in citation tool under Tools > Citations, and it works, but check what it says at the top: it offers MLA eighth edition. MLA 9 kept the container system from MLA 8, so most works-cited entries come out the same, but if you were told to use MLA 9 you want a tool that says MLA 9.
Our free Google Docs citation add-on does MLA 9, and it builds the entry from an identifier rather than from a form you fill in. Install it from the Workspace Marketplace, open a document on a computer, and open the Citation Manager from the right side panel.
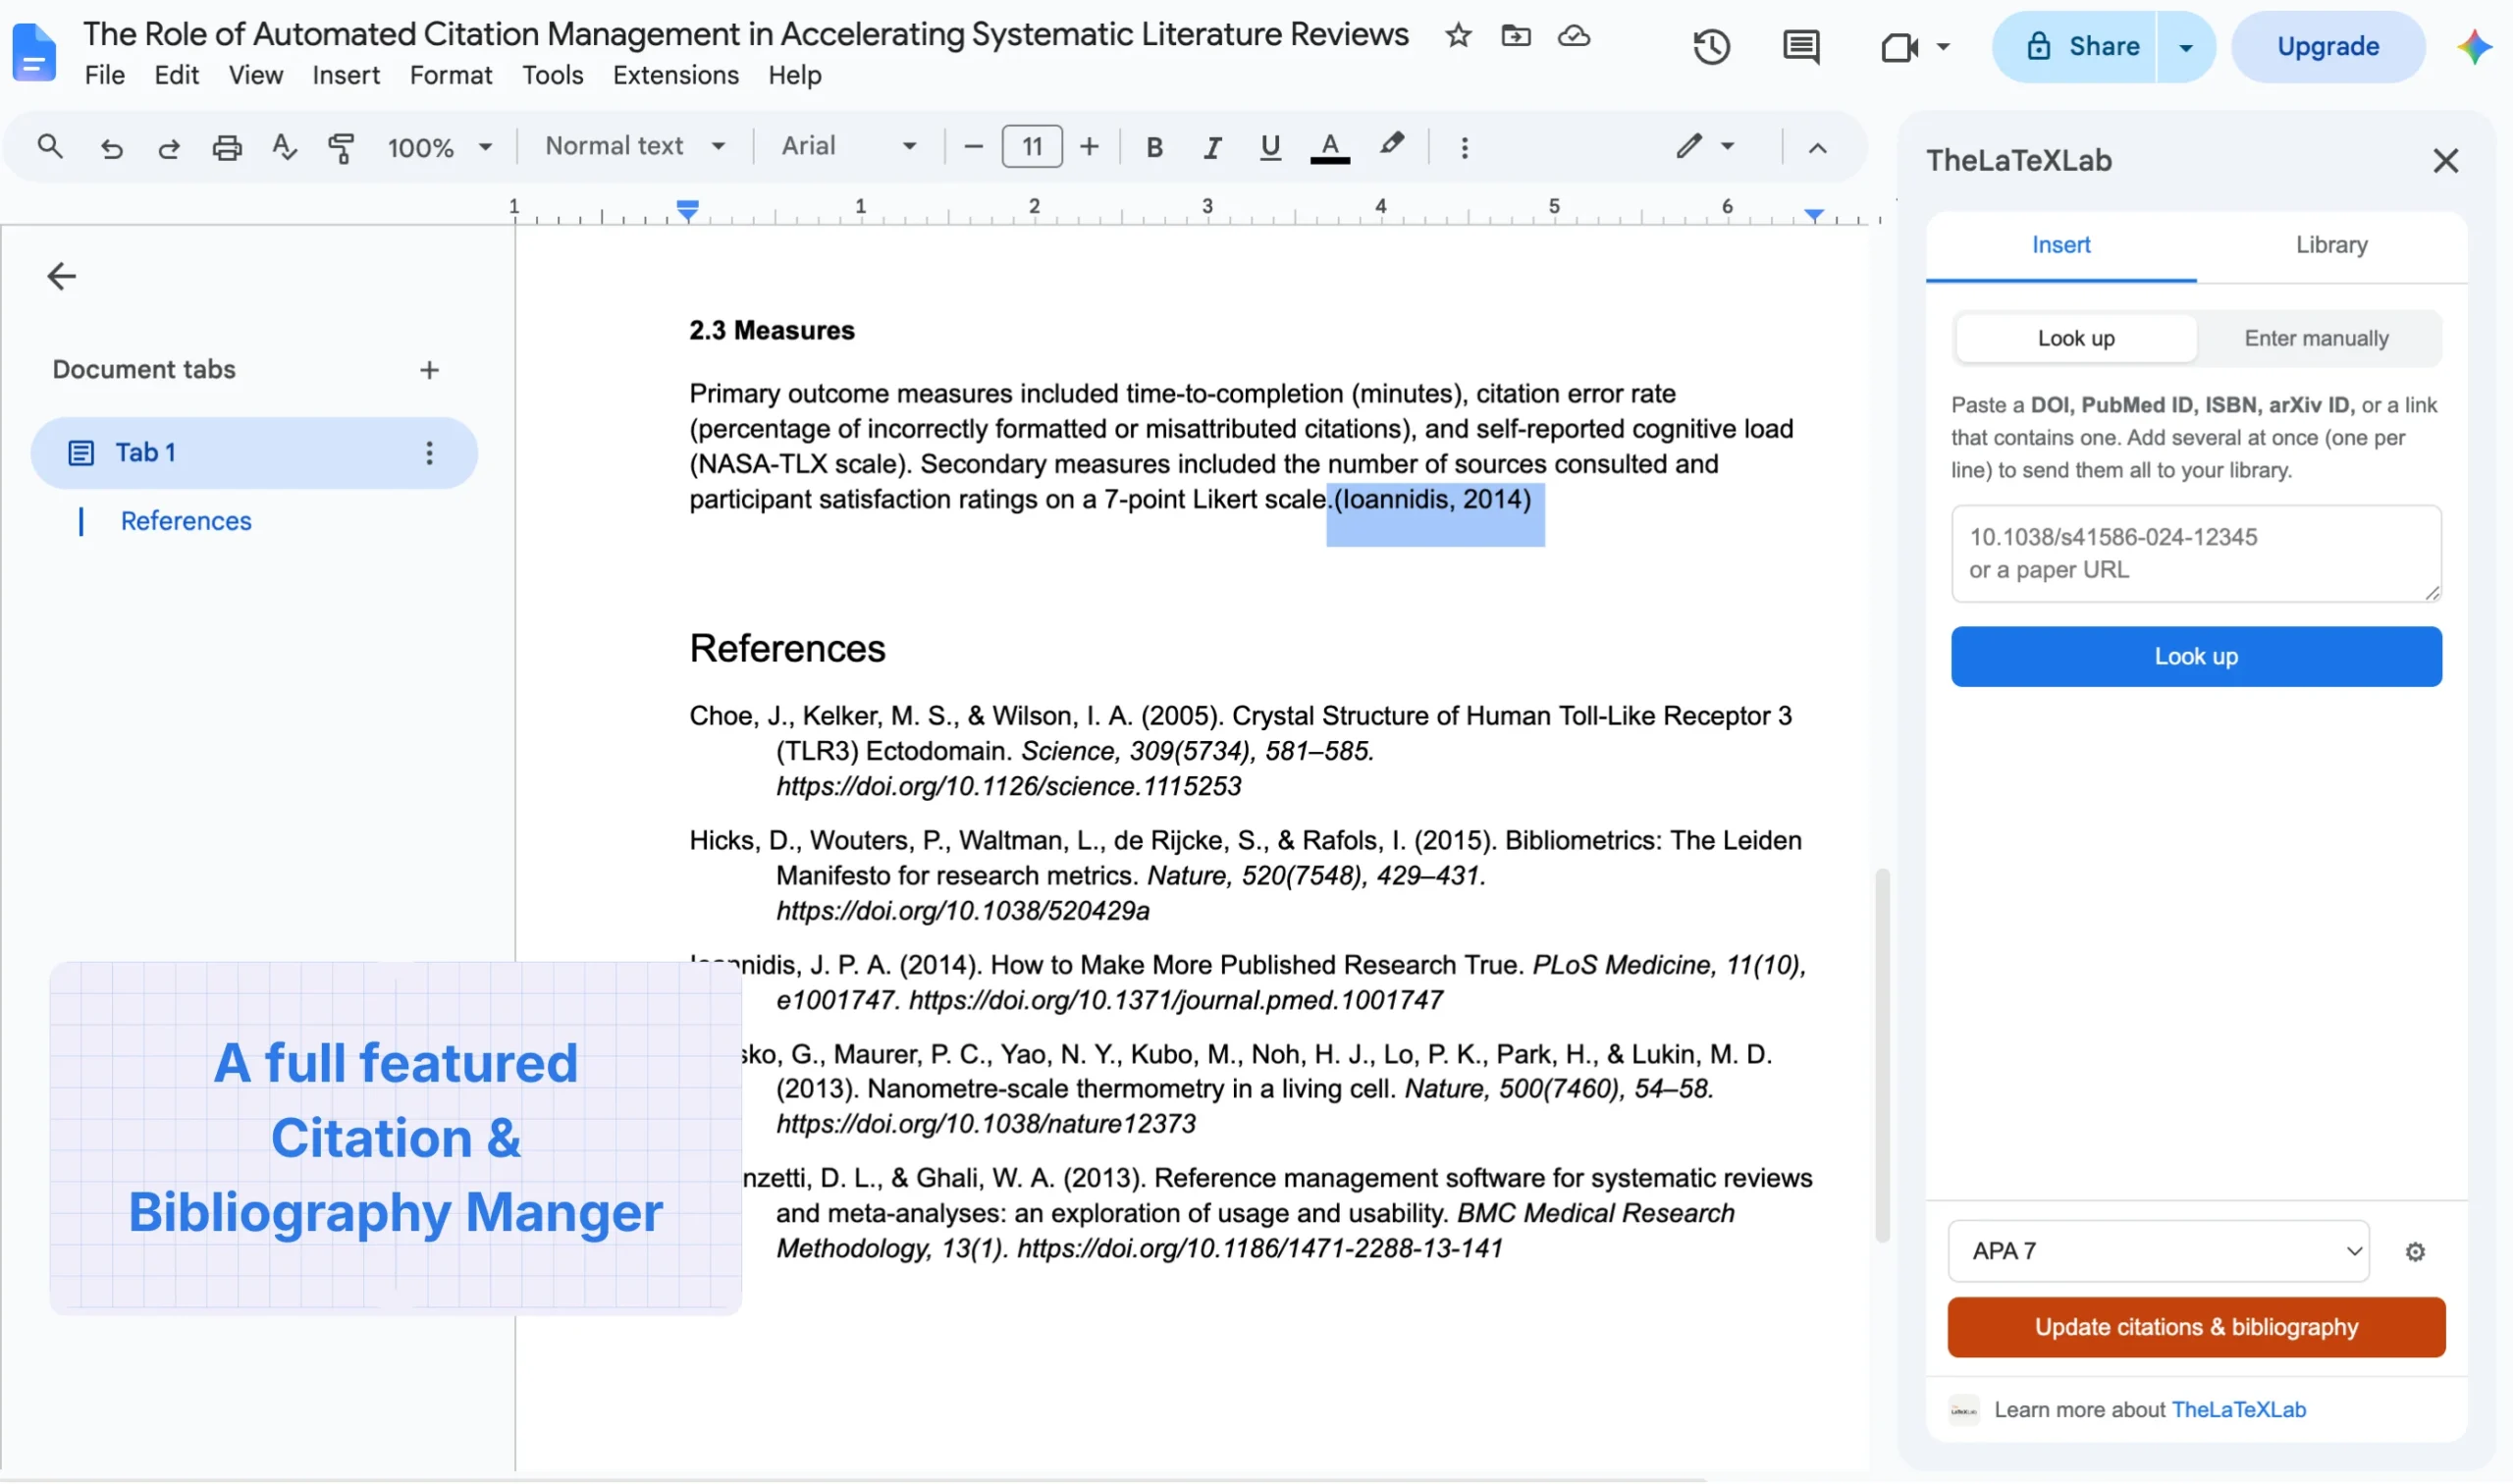
On the Insert tab, paste a DOI, PubMed ID, ISBN, arXiv ID, or BibTeX entry and click Look up. You get a preview to check before anything goes into the document.
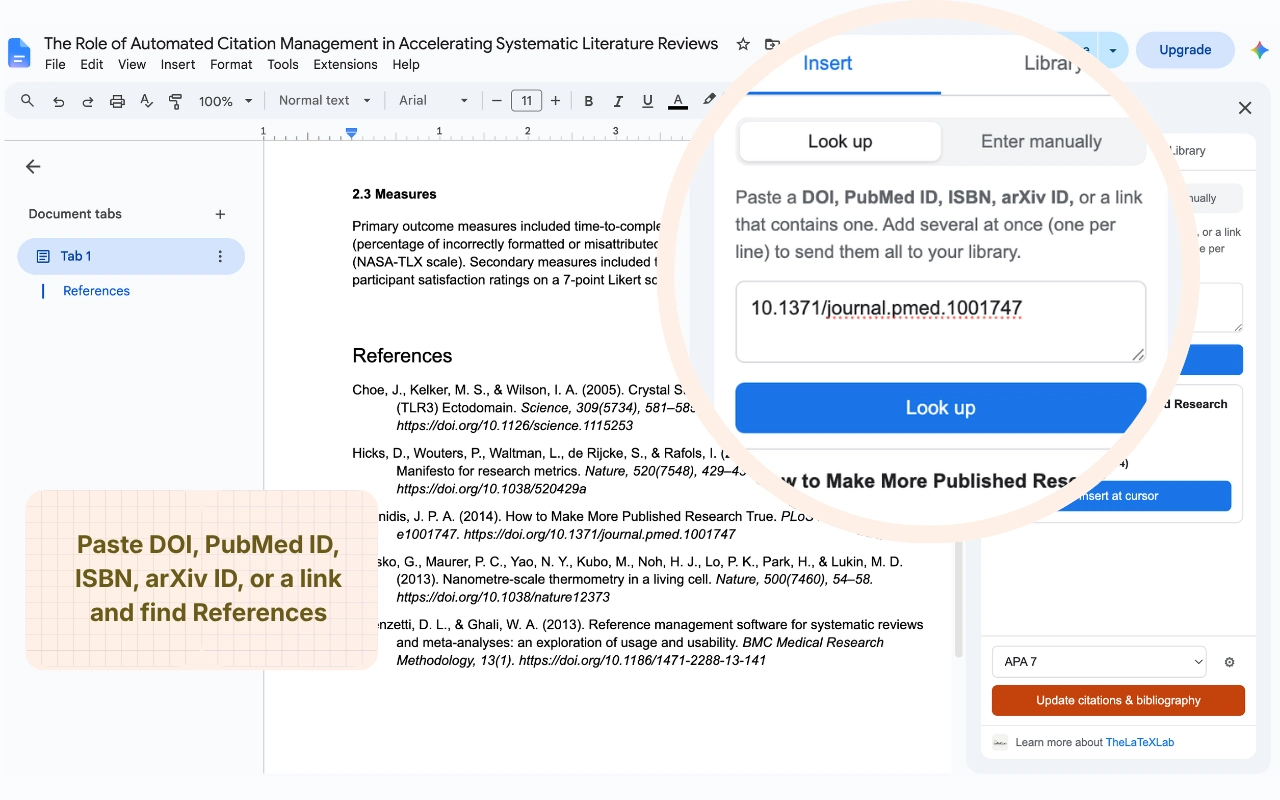
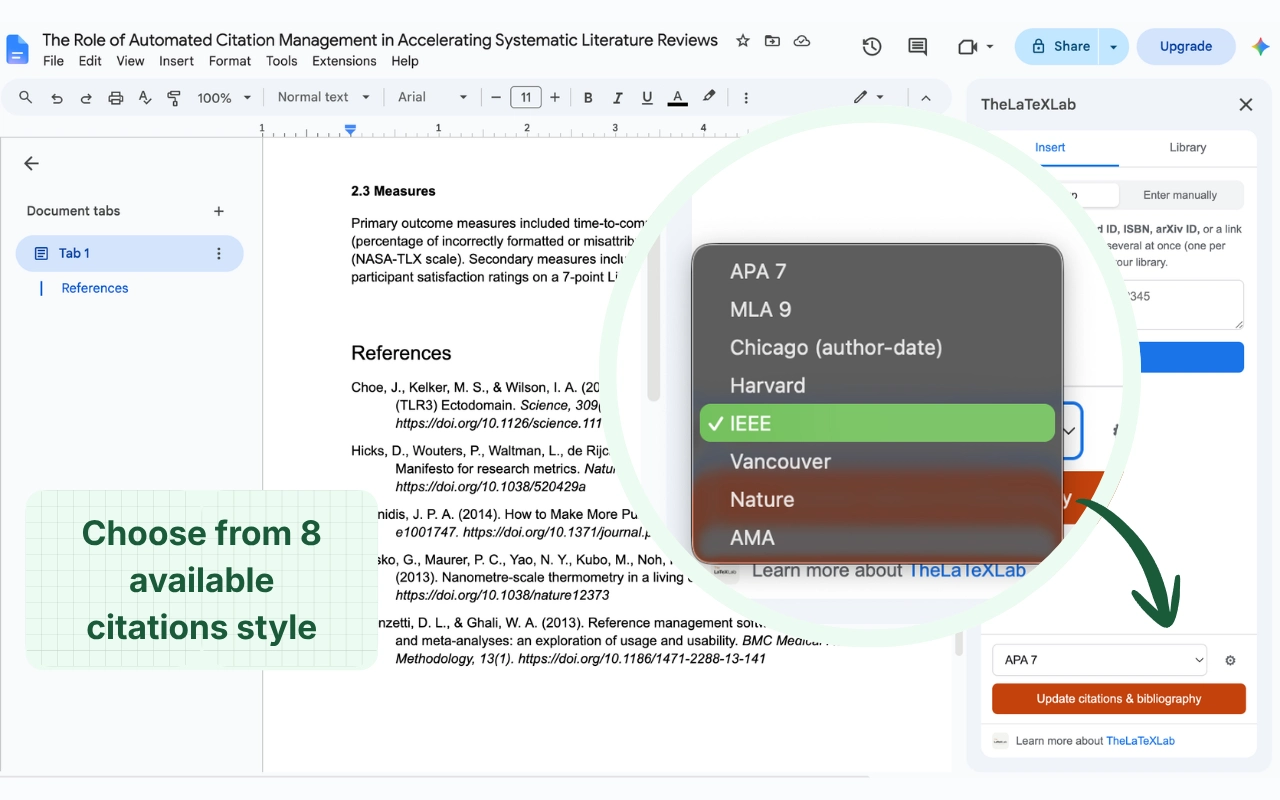
Put your cursor where the citation belongs and click Insert at cursor. Pick MLA 9 from the style dropdown at the bottom of the sidebar.
MLA in-text citations are author and page number in parentheses, so check the page number after inserting. A lookup gives you the source, not the specific page you are quoting, and that part is yours to add. The full walkthrough is in our guide to adding citations in Google Docs.
MLA 9 citations and a Works Cited list, built from an identifier.
Paste a DOI, ISBN, PubMed ID or arXiv ID and the add-on formats the citation and the works-cited entry in MLA 9. Seven other styles too. Free, no sign-up.
How to make the Works Cited page in Google Docs
Works Cited starts on its own page at the end.
- Put your cursor at the end of the last line of the paper and press Insert > Break > Page break. Do not press Enter until a new page appears, because that breaks the moment you edit anything above it.
- Type Works Cited and center it. Plain text, no bold, no underline.
- Press Enter, then left align, and add your entries. Alphabetical by the first word of each entry.
- Select the entries and apply a hanging indent: Format > Align & indent > Indentation options, set Special indent to Hanging at 0.5, then Apply.
- Check it is still double spaced with no gaps between entries.
If you clicked Update citations and bibliography in the add-on, the list is written for you and already alphabetized, and you only need the page break and the hanging indent. One warning if you are annotating the entries: re-running the update replaces the list in place, so finish adding sources before you write anything into it. That behavior and the indent settings for annotations are covered in our guide to the annotated bibliography in Google Docs.
The Report MLA template in the Google Docs template gallery
Google ships an MLA template, which saves the setup if you would rather not do it by hand. Open File > New > From template, scroll to the Education section, and pick Report MLA. It comes with the margins, spacing, header, and a first-page heading already in place, filled with placeholder text you replace.
Two things to fix in it straight away. Put your own surname in front of the page number in the header, which the template cannot know. And check the font and spacing against the list at the top of this post rather than assuming, since a template is a starting point and instructors mark against the style guide.
MLA format in Google Docs on a phone or tablet
Do the formatting on a computer. The Google Docs mobile apps cannot set a hanging indent, which you need for Works Cited, and add-ons do not run there at all, so the citation step is unavailable. Drafting on a tablet is fine. Format and cite later in a desktop browser.